Often new gardeners desire to have raised beds and wonder what would be the best, cheapest, or longest lasting material.
They are also sometimes faced with ugly concrete slabs that they want to remove. The following is a way to deal with both issues and all you need is the desire and a strong back. If you spaced it out over a few weekends it is well within the capabilities of most folks.
The main things you need are the aforementioned strong backs, some simple tools and the vision to see the finished product.
If you find that your slab has embedded wire mesh or rebar in it all bets are off. The hassle of cutting thru the mesh/rebar and the inevitable raw metal sticking out of the edges will make this project MUCH more difficult and the chunks will be for the most part unusable.
You wouldn't want a wall full of rusty, raw metal edges anywhere near your garden. If you find this is the case call someone in to remove the concrete slab for you and start with a blank slate.
The term for this is Rip-Rap. I had a link with a detailed how-to on doing this but I can't find it so I'll try and explain the process myself.
Some other advantages to this are, you are getting free material that will last a very long time, you are recycling, and you don't have to pay a large disposal fee to remove the slab. You will need to remove some debris, but with planning it will be much less than the cost of hauling away the entire amount.
The first thing I'd do is sketch out the future locations of the beds before the demolition. This will allow for you to plan the beds to use up as much of the slab pieces as possible, minimizing the amount of debris you need to remove. A very rough estimate would be 1 running foot of 12" high wall for every 4 Sq. Ft. of slab you are removing. This will depend on how thick the slab pieces are and how wide a wall you are building.
Use a pinch bar and a heavy sledge to smash the slab into pieces. You can try for uniformity of size with the pieces but this is very much hit and miss in practice.
Start at a convenient corner and pry up the slab a bit with the pinch bar. This allows the cement to break fairly easily with just one or two hits from the sledge. Just work thru the slab using the busted pieces as fulcrums for the pinch bar.
If you try to smash up concrete without lifting it up a bit you will find it VERY hard going. The sub-base absorbs most of the force of the blows and you will quickly wear yourself out. You could rent a jackhammer but in practice the "Lift and Smack" method works much faster on most average slabs you will find.
Once you have the cement reduced to manageable sized pieces clear it from the areas you wish to the have beds in. Clean the debris down to the soil. Prepare a level trench as wide as needed and a few inches deep to define the edges of your walls.
Place a layer of leveling base in this trench (stone dust, coarse sand, or if you are so inclined, mortar). If you are lucky you may be able to reuse some of the existing sub-base for this step. Use some of the larger pieces of broken cement as a base course and carefully place and level them is whatever material you have chosen for the leveling course.
Continue to stack the busted up pieces staggering the joints as you go. You can mortar the pieces together or dry stack as you desire. Use the straightest edges as the face of the wall. If you use mortar you needn't be fussy about it. Just a couple of fist sized dollops under each piece would suffice to adhere them together and will serve as a cushion to level the sections to each other.
You may need a small 4 lb. hammer and a wide stone chisel to shape and "dress" the pieces to fit but cement is fairly easy to work in this way. You could also rent a wet saw if you desire much tighter joints.
Ideally the wall should SLIGHTLY taper back as you go up but for short walls of say 12-18" this is not crucial.
Cut long strips of heavy landscaping fabric and drape them inside the walls to contain the soil from washing thru the joints. Use dots of construction adhesive to hold it in place until you get the final top course in place. This top course can be made from the same concrete pieces or use some other material for a more finished look.
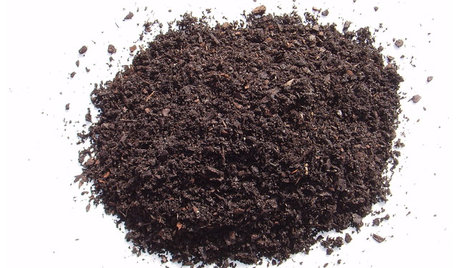
You can then gather up all the unused debris and whatever substrate was under the slab for removal and begin the process of amending the soil that was under it. For the soil inside the raised beds I would look to purchase good topsoil or better yet, a topsoil and compost to fill these areas
After the wall is built you can spray or brush on a concrete stain or paint to disguise the grey concrete color. A deep brown blends in quite well and camoflages the utilitarian nature of the material well.
Hope this helps and Good Luck


Related Discussions
Newbie Here: Can We Talk About Raised Bed Planters?
Q
Should we take an almost-free cruise?
Q
Raised patio, bringing in dirt and building raised landscape bed
Q
Raising Eucalyptus deglupta in a cool frost-free (sub)tropical climate
Q