"It is often asked what is the best or simplest way to create a new garden bed. These are some suggestions that have been brought up on forum discussions on ways to do this effectively."
You could get a hold of a tiller and tear into things that way. If you have very hardpacked, neglected soil that may be a necessary first step. The drawbacks are that this method is very disruptive to the soils microbes and fungal life and may also bring up many dormant weed seeds.
In many cases there are other less disruptive methods that are considerably easier on your soil and your back.
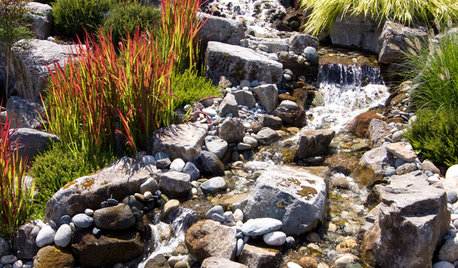
One that is gaining popularity is smothering the area under a layer of newspaper or plain cardboard and covering it over with a thick mulch. The mulch is made up of the same type of materials you would use in a traditional compost pile but is allowed to decompose in place directly on the new bed. The materials you use smother the unwanted grass and weeds and over time will enrich and improve the soil in the bed.
The soil will gradually become looser from the activity of the earthworms and other soil creatures without the need for double digging or power equipment.
This method is very low impact both to the soil and the gardener. You can often plant things immediately after prepping the bed.
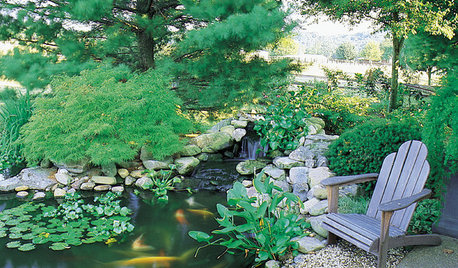
Define The Area
Draw out the your yard area on graph paper to visualize where you want to create beds if you are working on an overall design. For a single bed you can just outline where it is going to be directly in the garden. There are marking paints that are used upside down that make this very easy to do or you can fill an old baby powder container with flour and use this to layout the perimeter of the area.
If this area is going to be created from an existing lawn you can just let the grass grow a bit long, then make a single pass with the mower along the border of where you want the new bed to be. This will give a strong visual for where the edges are and ensures that the radius of the curves are not too tight or difficult to mow along.
If you are going to be planting immediately and have the plants on hand you can place them out in their pots to get an idea of where you wish them to be placed. It is much easier to rearrange things on paper or move pots around than to dig up and reposition plants later.
Creating The Edges
Once you have the beds laid out you can cut in and define the edges. A shallow trench is an easy to maintain border for beds that costs nothing (other than some time). It is easily maintained by pulling back the mulch material to clean up and redefine it periodically. Once a year should be sufficient in most areas. You can also easily expand a bed if it has no permanent edging to remove.
With a very sharp straight edged spade cut in a line about 4" deep along the edge you have laid out. Cut in another parallel line about 6" (or the width of your shovel) from the first. You should then be able to easily strip off this ribbon of sod by slipping the spade under it. A garden fork also works well for this. Lay the sod strips, face down, along the inner edge of the trench. If you have a scuffle or action hoe run it along the bottom of the trench to give it a nice flat well defined shape.
At his point you can plant or move on to the next step to let the bed develop for a time. If you wish to plant just place your plants in their desired positions. Remove an area of sod twice the size of your pot and dig your planting hole. Amend this hole with some good compost and plant.
Mulching Over The Bed
Once you have a well defined trench edge you can layer newspaper or brown cardboard over the inside of the bed area. This will smother 99% of whatever is growing there. Any survivors will be weak and easily pulled out or cut down and smothered with additional material.
Over this barrier you can build up layers of organic materials lasagna fashion or all mixed together if that is your preference. Compost, chipped leaves, grass clippings, chipped prunings, produce trimmings, coffee grounds, aged manure, whatever you can gather that will rot. Regular reading of the posts on the Forum and you will find that there are a number of materials that folks have come up with or scrounged that are suitable. Pile it on as thick as you can and be sure it is well moistened. If you have set out plants keep the mulch well away from the bases of the new plantings.
You can now cover this material with whatever suits you as a top layer. Chipped leaves, or grass clippings are free and will work well. Wood chips can often be found from tree trimmers and they will also serve as a good "top dressing" to retain moisture and protect your soon to be developing microherd.
In a short time the material will break down and become a rich, loose loam. Keep is covered with regular additions of compost and some fresh mulch and you will have a very healthy, weed free bed.
If you have aditional questions about this topic you can post on the Soil Forum and you will find many folks who will be eager to help you along.


Related Discussions
Is this a good plan to create a BIG no-till plot by next spring?
Q
new fllower garden... how to prepare soil?
Q
Trench composting to prepare bare area for fall planting
Q
Preparing unused clay soil for Fall planting
Q